
 en
en  English
 中文简体
中文简体 Español

Smoke curls out from the fuse box at the back of a maintenance room. A staff member pulls a portable fire extinguisher off the wall, removes the safety pin, squeezes the handle, and the unit discharges correctly. The fire stays small and the damage is limited. In that chain of events, every physical part of the extinguisher has a job. The conclusion that any technician, safety officer, or buyer should carry is simple: an extinguisher is only as dependable as the parts inside it, and knowing those parts is the first step toward choosing, checking, and maintaining equipment that will actually work in an emergency.
A fire extinguisher looks like a plain cylinder, but a typical stored-pressure dry powder unit contains nearly a dozen functional components. The pressure gauge tells you whether the container is still charged. The siphon tube carries agent from the bottom of the cylinder. The valve and operating lever hold the pressure in and release it when needed. The hose and nozzle direct the stream toward the fire. Around those main parts are seals, springs, pins, labels, and brackets that are easy to overlook and equally easy to damage. Whether you are replacing a broken unit, ordering spare components, or simply reviewing the extinguishers in your facility, it pays to know each part by name and by function.
This guide breaks down the standard parts of a fire extinguisher, what they do, which materials they are made from, and how failures usually appear. The part family is shared across stored-pressure dry powder, carbon dioxide, water, and foam units, even when the materials and discharge components differ from one type to another.
Fire Extinguisher Parts at a Glance
Start with the full picture and then examine each component. A conventional portable extinguisher is built around the parts listed below. Each one has a specific role in storage, operation, or discharge, and a defect in any of them changes the behaviour of the whole unit.
| Part | Role | Typical Location |
|---|---|---|
| Cylinder body | Holds the extinguishing agent and expellant gas under pressure | The main container |
| Valve assembly | Seals the cylinder and controls release of the agent | Top of the cylinder |
| Operating lever and handle | Converts hand pressure into movement of the valve stem | On the valve body |
| Safety pin and tamper seal | Prevents accidental discharge and shows whether the unit has been used | Through the lever and valve |
| Pressure gauge | Shows whether internal pressure is within the operating range | On the valve or cylinder neck |
| Siphon tube | Carries liquid or powder from the bottom of the cylinder to the valve outlet | Inside the cylinder |
| Hose and nozzle or horn | Transports and shapes the stream of agent | Connected to the valve outlet |
| Labels and instruction plate | Provides operating, classification, and inspection information | On the cylinder body |
| Seals, O-rings, and spring | Maintain tightness and return parts to their rest positions | Inside the valve and at connections |
This table is simplified, but it matches the architecture of most portable extinguishers sold and serviced today. In the sections below, each part is examined in detail, with the practical implications for performance, inspection, and replacement.
Valve Assembly: The Part Your Hand Actually Operates
Conclusion first: the valve is the most safety-critical part of a fire extinguisher. It keeps the agent sealed inside the cylinder for years, then opens fully in a fraction of a second when the lever is squeezed. Everything else, including the cylinder, hose, and nozzle, is designed around the valve body, its sealing surfaces, and its discharge orifice.
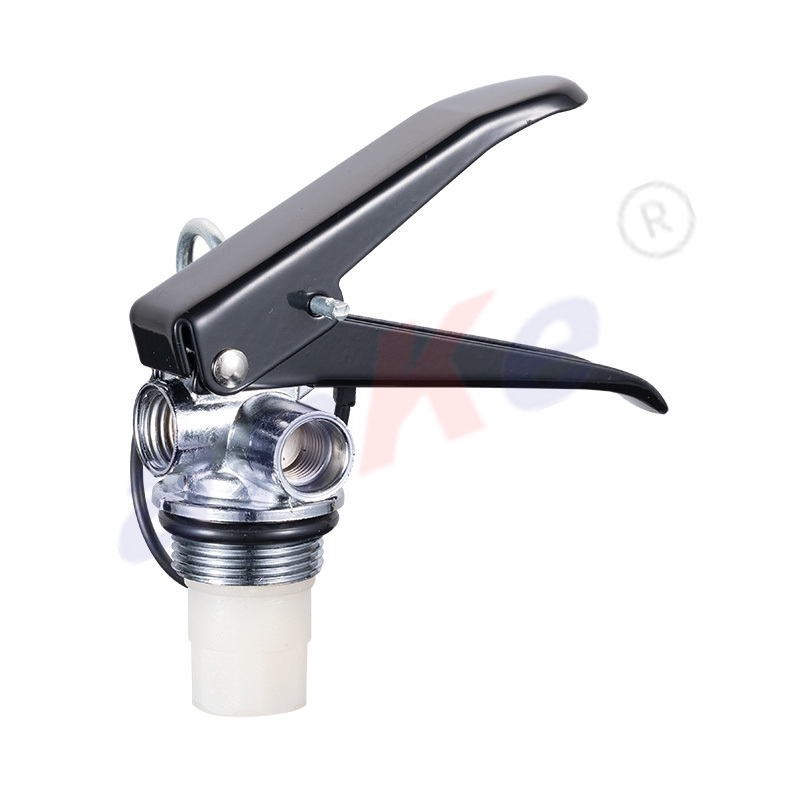
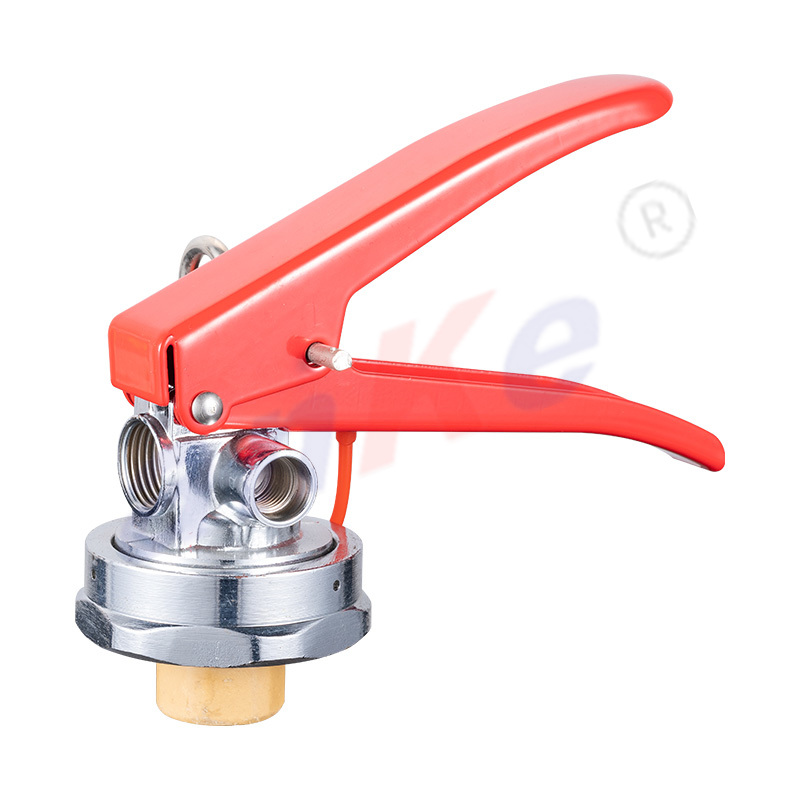
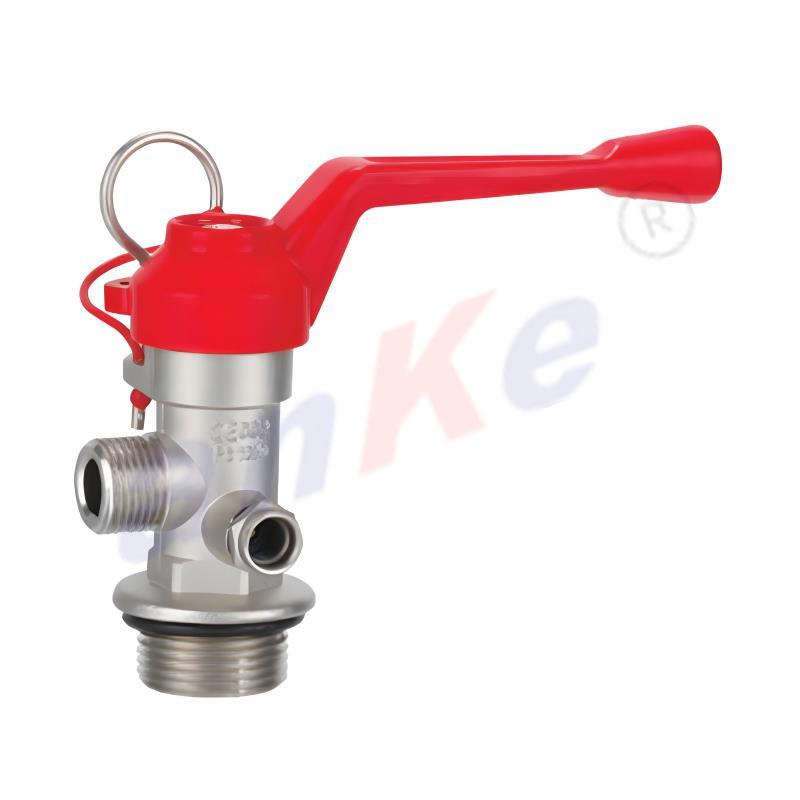
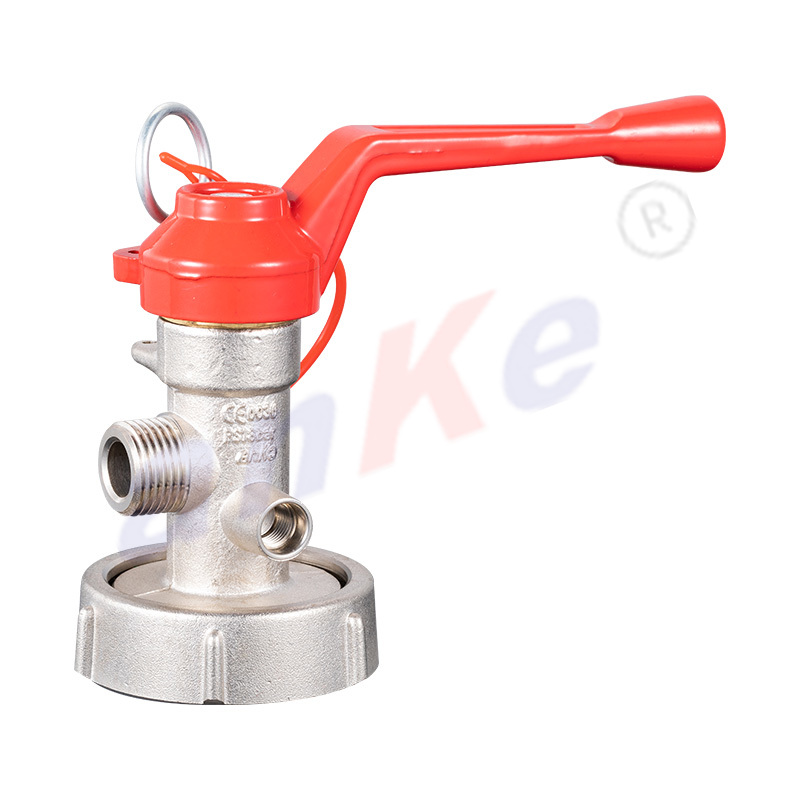
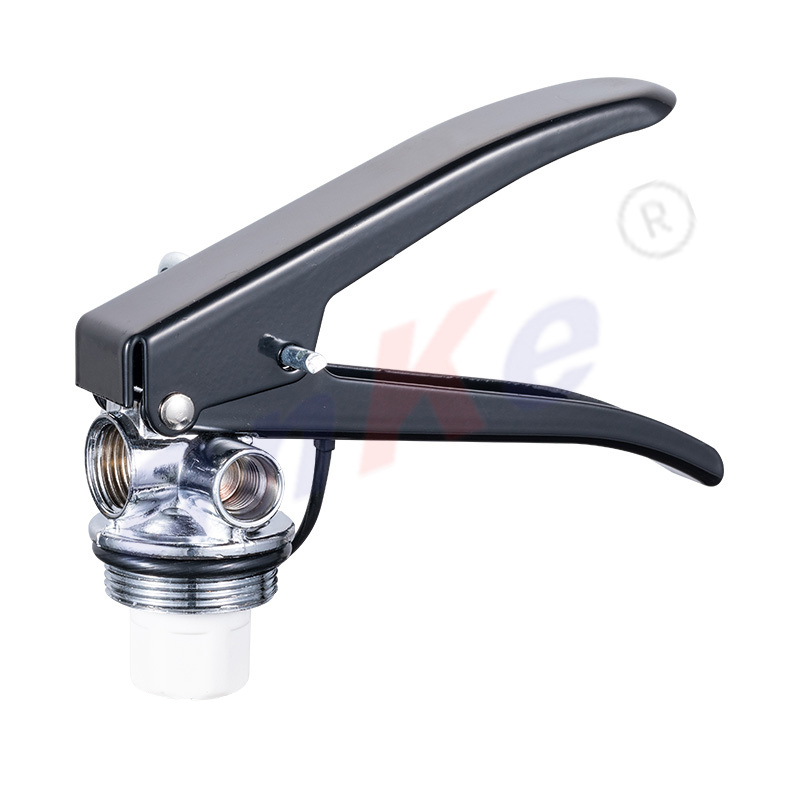
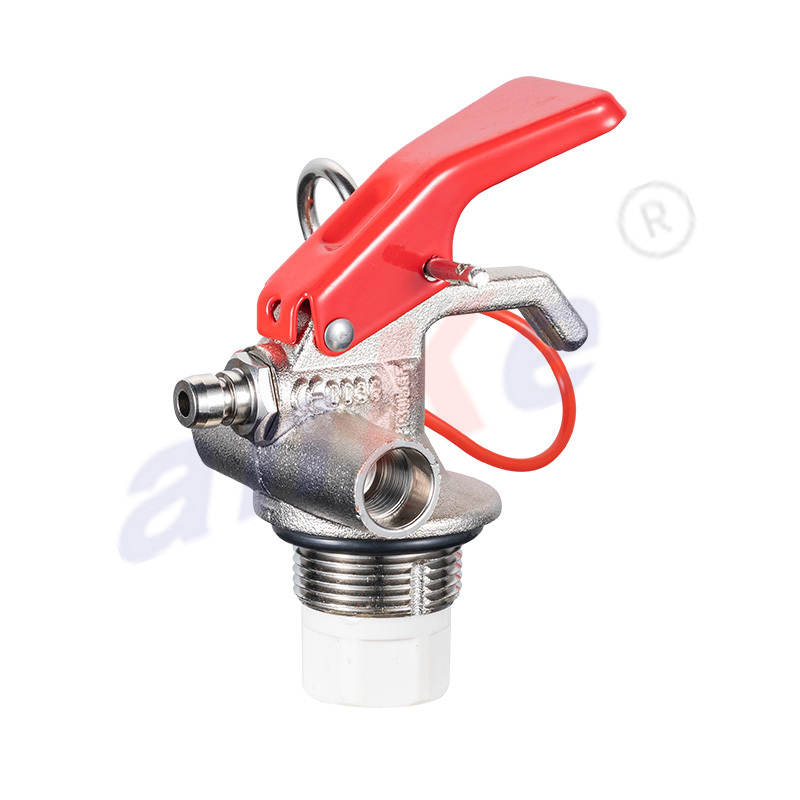
The valve assembly is not a single piece. It is a group of components that work together: the valve body, the operating stem, the spring, the lever, the safety pin, the outlet thread, and the internal seals. If any of these parts stick, leak, or break, the extinguisher either discharges when it should not, or fails to discharge when it must.
Valve Body and Outlet
Most portable extinguisher valve bodies are machined from brass, which resists corrosion and holds threads well. Higher-end CO2 valves are also made in brass or stainless steel, while some dry powder valves use an aluminium body to reduce weight. The body contains the internal seat where the stem seals against the outlet, and its lower thread connects to the neck of the cylinder. On the side, a swivel nut or female thread accepts the hose or horn assembly.
The outlet size and thread pattern are standardized in most markets, which matters when you replace a hose or horn. A valve with a worn or mismatched outlet thread can let a hose blow off during discharge, turning a controlled stream into an unpredictable one. This is a real procurement risk, not a theoretical one.
Operating Lever, Handle, and Stem
The upper lever is usually forged or die-cast from zinc or aluminium alloy and pivots on the valve body. When you squeeze the lever against the fixed handle, it pushes the operating stem downward. The stem compresses the spring and lifts the sealing disc off its seat, opening the passage from the siphon tube to the outlet. When you release the lever, the spring pushes the stem back and the seal re-engages, stopping the flow.
The spring and stem are simple parts, but they control the most important action of the extinguisher. A weak spring could allow the valve to remain slightly open, causing a slow leak. A bent stem could prevent full opening, reducing the discharge rate to the point where the extinguisher cannot knock down the fire.
Safety Pin and Tamper Seal
The safety pin passes through the upper lever and a fixed lug on the valve body. Its only job is to block the lever from moving down, so the valve cannot be opened accidentally during transport, mounting, or handling. The tamper seal, normally a plastic tie or lead seal, holds the pin in place and gives a visual indication of whether anyone has operated or partially operated the unit.
A missing pin or a broken seal is an immediate red flag during inspection. Never assume that a missing seal is harmless. The extinguisher may have been dropped, improperly handled, or partially discharged and refilled without proper control. Any unit with a broken tamper seal should be checked by a qualified service technician before being returned to service.
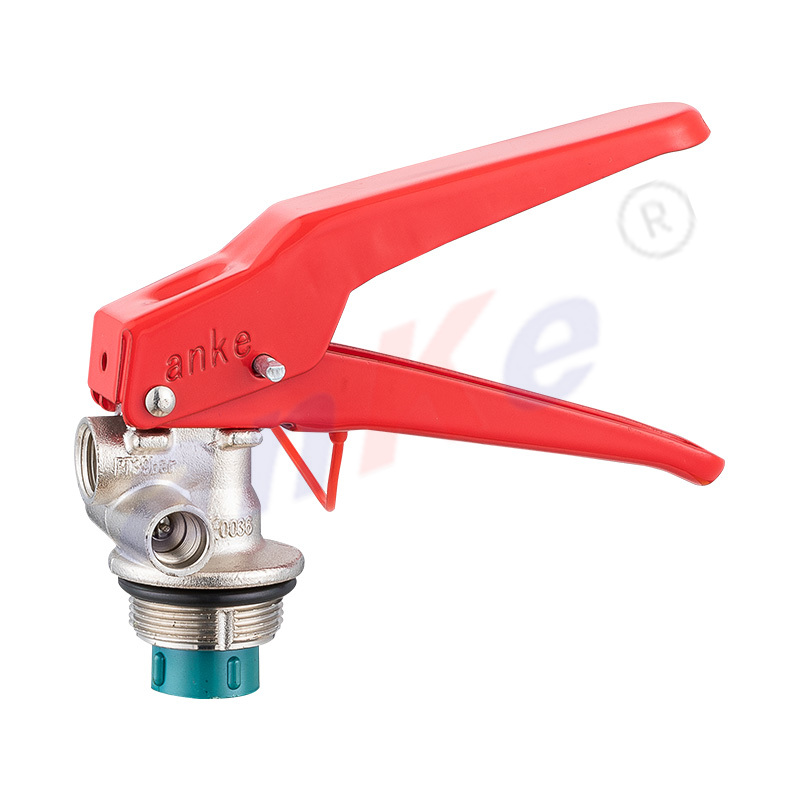 4-12KG Dry Powder Fire Extinguisher Valve Model 1001This brass or aluminum valve controls agent release in 4-12kg dry powder extinguishers. Its eight components maintain pressure and enable hand-operated discharge, making it a key replacement part when tamper seals or safety pins show signs of damage.View Product →
The internal geometry of the valve also varies with the extinguishing agent. A dry powder valve needs a narrow seat that keeps the powder from leaking past the seal, while a water or foam valve must handle a liquid column and allow smooth priming of the siphon. CO2 valves are designed for very high internal pressure, up to 57 bar at room temperature, and use a different seat arrangement to prevent gas loss through the stem. Understanding these differences helps you select a replacement valve that matches the cylinder and the agent. For a deeper look at the opening sequence, see how the valve opens in a stored-pressure extinguisher.
Cylinder Body and Neck: The Pressure Container
The cylinder is the largest part of the extinguisher and the one that people notice first, but its role is simpler than the valve: it must contain the agent and the expellant gas safely for the service life of the unit. In a stored-pressure dry powder extinguisher, the cylinder is pressurized continuously. In a CO2 extinguisher, the cylinder itself is the pressure vessel that holds liquid carbon dioxide at room temperature. In a cartridge-operated unit, the main cylinder holds only the powder at atmospheric pressure, and a separate small cartridge contains the compressed gas.
Most portable cylinders are made from welded steel sheet, then painted or coated for corrosion resistance. Lightweight CO2 extinguishers from 2 kg to 5 kg often use alloy steel to reduce shipping weight while still passing the high-pressure tests required for gas cylinders. Water and foam units are also steel, but they are more vulnerable to internal rust because water remains in contact with the cylinder wall between inspections.
Neck, Collar, and O-Ring
The neck of the cylinder has a threaded opening where the valve is fitted. Many cylinders also have a neck collar, a ring around the neck that protects the valve during transport and provides a lifting point for carrying the extinguisher. Between the valve and the neck, an O-ring or a gasket creates the primary seal. This seal is often the first part to fail on an old extinguisher because rubber hardens, cracks, or extrudes after years of pressure cycling and temperature changes.
When servicing an extinguisher, the neck threads and the O-ring groove should be cleaned and inspected before the valve is reinstalled. A damaged thread or a flattened O-ring will cause a creeping leak that drops the pressure gauge into the red zone and leaves the extinguisher useless. This is one of the most common reasons extinguishers fail hydrostatic retesting or routine pressure checks.
Siphon Tube: The Hidden Channel Inside the Cylinder
The siphon tube is easy to forget because it is not visible from the outside. Its job is to draw the extinguishing agent from the bottom of the cylinder and guide it into the valve outlet. In a stored-pressure unit, the pressure inside the cylinder pushes down on the agent, forcing it up through the siphon tube when the valve opens. Without the siphon tube, the valve would only release gas, not powder or liquid.
Siphon tubes are usually made of rigid plastic, aluminium, or steel, depending on the agent. For dry powder, a plastic tube with an anti-static additive is common, because dry powder flowing through a plastic tube can generate static electricity. Powder also tends to compact and cake at the bottom of the cylinder, so the lower end of the tube often has a strainer or a slotted opening that prevents large agglomerated lumps from entering the valve.
The length of the siphon tube matters. It must sit very close to the bottom of the cylinder, normally with a small clearance of a few millimetres, so that nearly all the agent can be discharged. A tube that is too short leaves a significant amount of agent in the cylinder and reduces effective capacity. A tube that is too long blocks the bottom opening and reduces flow. When you order a replacement siphon tube, it must match the cylinder height, not just the valve thread.
On CO2 extinguishers, the siphon tube extends from the valve down into the liquid CO2, and its internal diameter controls the flow rate. If someone installs a siphon tube with the wrong diameter, the discharge time changes drastically, which affects the extinguisher rating. This is a frequent mistake in self-refilling of CO2 units and a major reason why factory-made assemblies are preferred.
Pressure Gauge: The Status Window on Top
The pressure gauge is the only part that tells you, at a glance, whether an extinguisher is ready. All stored-pressure extinguishers with a discharge pressure below a certain level include a gauge by law or by standard. The conclusion is direct: a gauge in the red zone, broken, or stuck means the extinguisher cannot be trusted, and it should be taken out of service immediately.
Most gauges used on extinguishers are Bourdon tube or diaphragm gauges. A curved metal tube straightens slightly as internal pressure rises, and that movement is transmitted through a small gear to a needle. The dial is divided into a green operating zone and two red zones. At room temperature, the needle should sit inside the green zone. In cold weather, a dry powder extinguisher may show a lower reading even though it is fully charged, simply because the gas contracts. The reading should be judged at the temperature where the unit is stored.
Gauges fail in predictable ways. The needle can stick at zero, which usually means the sensing element has leaked or the internal mechanism is jammed. The lens can fog up when internal moisture freezes, hiding the needle completely. The case can crack from a drop, and water can enter and corrode the movement. A gauge that is dented, cracked, or permanently in the red zone should be replaced, and the cylinder should be checked for actual pressure before refilling.
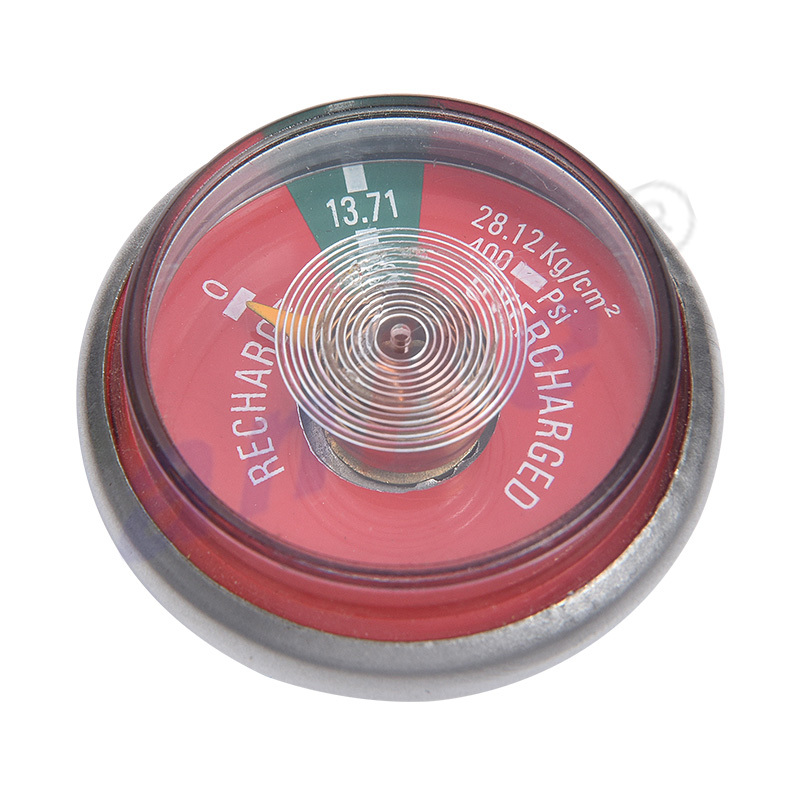 Red Spring Pressure Gauge for Fire ExtinguishersThis bright red gauge offers a clear dial for quick pressure checks, helping you spot stuck needles or fogged lenses during inspections. Its corrosion-resistant construction suits various environments, ensuring reliable monitoring of extinguisher readiness.View Product →
The chart below shows typical full-charge pressure ranges for common portable types at 20 degrees Celsius. These values are intended for orientation only, because the exact pressure depends on the agent formulation, the cylinder size, and the applicable standard.
Comparing a CO2 extinguisher to a dry powder unit makes the difference obvious. The CO2 cylinder operates at roughly five times the pressure of a stored-pressure powder unit, which is why CO2 valves and cylinder materials are always designed for high pressure and why CO2 extinguishers do not carry a pressure gauge. Instead, they are checked by weighing the total unit. Regular pressure gauge inspection is essential for the stored-pressure types that do have one.
Hose, Nozzle, and Horn: Shaping the Discharge Stream
The discharge assembly controls where the extinguishing agent goes. A unit with a full charge and a healthy valve can still be ineffective if the hose is blocked, cracked, or fitted with the wrong nozzle. In practice, this is the part of the extinguisher that suffers the most physical abuse, because it hangs outside, gets stepped on, and is frequently knocked against walls and floors.
Dry Powder and Foam Hoses
Stored-pressure dry powder extinguishers in the 4 kg to 12 kg range typically use a short rubber or PVC hose with a plastic or metal nozzle. The hose must be flexible at low temperatures without cracking, and the internal diameter must match the discharge rate of the valve. A hose with a smaller diameter creates back pressure and slows the discharge. A hose that is too large makes the stream weak and difficult to aim.
CO2 Horn and Swivel Joint
CO2 extinguishers use a rigid discharge horn instead of a hose. The horn is commonly made from plastic, fibreglass, or rubber, and it is connected to the valve through a swivel joint so that the user can direct it without twisting the cylinder. The horn is shaped to slow and spread the CO2 flow, which allows the gas to form an ice-like cloud of snow. Never handle the horn during discharge, because the expanding CO2 cools it rapidly and can cause frostbite. Some CO2 units have a smaller hose section combined with a horn, but the discharge horn itself is always the defining part.
Wet Chemical Wands and Nozzles
Wet chemical Class K extinguishers used in commercial kitchens have a longer application wand or a hose with a special nozzle that produces a gentle spray. The purpose is to control the spread of the chemical mist and to protect the operator from splashing hot oil. Using a standard nozzle in place of the correct one for wet chemical units can make the discharge violent and hazardous, which is why replacement parts for these units should be verified against the manufacturer specification.
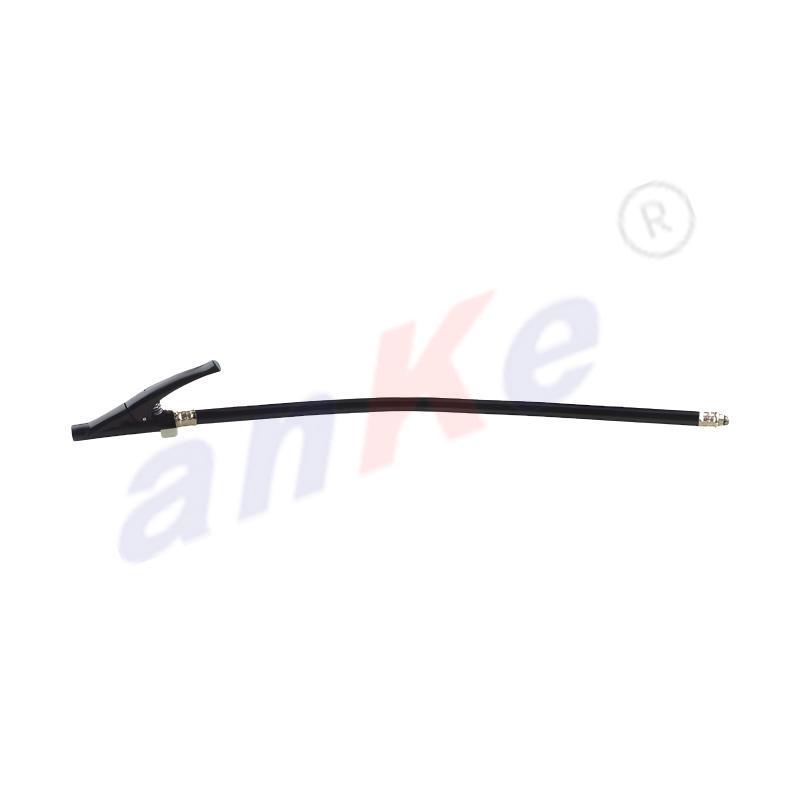 Dry Powder Fire Extinguisher Hose with Horn NozzleThis pressure-resistant rubber hose with reinforced fiber layers delivers dry powder at over 2.5MPa, featuring a trumpet-shaped nozzle for wide coverage. Its anti-static design and temperature resilience make it a suitable replacement for kitchen or vehicle extinguishers.View Product →
The table below compares the discharge parts across the main extinguisher categories. Notice that the part that changes is almost always the end fitting, not the valve or the cylinder.
| Extinguisher type | Discharge connection | End component | Key characteristic |
|---|---|---|---|
| Dry powder ABC | Rubber or PVC hose | Plastic or metal nozzle | Short hose about 40 to 60 cm, straight stream |
| CO2 | Swivel joint or short hose | Discharge horn | Rigid horn, cold-resistant material |
| Water and foam | Rubber hose | Nozzle with or without lever | Wider opening for liquid stream |
| Wet chemical Class K | Long hose | Application wand or spray nozzle | Gentle spray, operator protection |
Secondary Parts: Brackets, Base, Labels, and Small Fittings
Secondary parts do not participate directly in extinguishing a fire, but they determine whether the unit is available, identifiable, and easy to use. A missing wall bracket can leave an extinguisher lying on the floor where nobody can find it quickly. A faded instruction label can delay the operator in a stressful moment. These parts are cheap, but they are not optional in a well-maintained installation.
Wall Bracket and Vehicle Mount
Most portable extinguishers are supplied with a wall bracket, either a simple steel strap or a quick-release plastic cradle. The bracket holds the cylinder securely but allows one-handed removal. In vehicles, a mounting clamp with a quick-release band is used to keep the extinguisher from becoming a projectile during braking or a crash. Choose the bracket by the cylinder diameter, not by the extinguisher weight alone, because the strap width and curvature must match.
Bottom Ring and Base
Many extinguishers have a plastic or metal bottom ring, also called a base cup, that protects the painted cylinder bottom from scratches and rust. The ring also keeps the cylinder upright on uneven floors. If the ring is cracked or missing, water can collect at the cylinder base and start corrosion in a hidden area. This is one of the easier defects to miss because the cylinder looks fine from the side.
Carrying Handle and Protective Cap
Larger extinguishers have a plastic or metal carrying handle attached to the neck collar. On CO2 extinguishers, a protective cap or collar ring covers the valve area during transport. The cap prevents the horn and valve from being struck, and it also prevents dirt from entering the outlet thread. If the cap is lost, the unprotected horn can be damaged by the first impact.
Instruction Label and Rating Plate
The label on the cylinder is a functional part, not decoration. It shows the operating steps, the fire class ratings, the capacity, the agent type, the pressure rating, and the approval standard. Labels also include the service pressure and the date of manufacture. When a label is damaged, you can no longer confirm whether the extinguisher is correct for the hazards in the room, which is why labels should be replaced rather than ignored during servicing.
- Check that the wall bracket is tight and the extinguisher seats fully.
- Confirm that the tamper seal and safety pin are present and unbroken.
- Verify that the label is legible and free of oil or paint stains.
- Inspect the bottom ring for cracks that let moisture reach the steel shell.
- Look for dents or corrosion on the cylinder surface, especially around the base.
How Part Materials Are Selected
Material selection is the difference between a valve that still works after ten years and one that seizes after two. The conclusion for procurement is straightforward: match the material to the agent, the operating pressure, and the environment where the extinguisher will be stored.
| Part | Common material | Why this material is used |
|---|---|---|
| Valve body | Brass, aluminium, stainless steel | Brass is corrosion-resistant and machines cleanly; aluminium reduces weight; stainless steel is used for high-pressure CO2 and aggressive environments |
| Operating lever | Zinc alloy, aluminium | Light, strong, and economical to cast |
| Cylinder | Welded steel, alloy steel | Steel contains pressure safely; alloy steel saves weight for CO2 cylinders |
| Siphon tube | Plastic, aluminium, steel | Plastic resists chemical attack; metal tubes add strength in large units |
| Hose | Rubber, PVC, EPDM | Flexible at low temperature and resistant to the agent |
| Horn for CO2 | Plastic, fibre, rubber | Non-conductive and resistant to the cold discharge stream |
| Seals and O-rings | NBR, EPDM, silicone | Elasticity, chemical compatibility, and long-term sealing under pressure |
| Pressure gauge | Brass case, acrylic lens, bronze or steel internals | Corrosion resistance in humid conditions and clear visibility |
Brass remains the dominant material for valve bodies because it combines machinability, corrosion resistance, and thread strength. Aluminium valves are lighter, which is attractive in export logistics, but aluminium is softer and more sensitive to thread damage during repeated servicing. Stainless steel is reserved for CO2 valves and marine-rated products, where corrosion resistance is critical. Rubber compounds must be compatible with the agent; using a standard nitrile seal in a solvent-based foam extinguisher can cause swelling and leakage, while ethylene propylene rubber resists water and foam well but is not suitable for petroleum exposure.
How the Parts Work Together During Discharge
After all the parts are identified, the operating sequence shows why they must be matched. The sequence below describes a stored-pressure dry powder extinguisher, the most common portable type.
- The operator pulls the safety pin through the lever and removes the tamper seal.
- The operator aims the nozzle at the base of the fire and squeezes the upper lever toward the handle.
- The lever pushes the operating stem down, compressing the spring and lifting the sealing disc off the seat.
- The internal pressure, normally around 1.2 MPa for an ABC powder unit, pushes the powder upward through the siphon tube.
- The powder passes through the valve outlet and into the hose, where the nozzle narrows the stream and accelerates it.
- When the operator releases the lever, the spring returns the stem to its seat, sealing the valve and stopping the flow.
In a CO2 extinguisher, the same sequence is driven by the vapour pressure of the liquid carbon dioxide at the top of the cylinder. When the valve opens, some liquid enters the siphon tube and flashes into gas as it exits the horn, producing the characteristic snow. Because the pressure is so high, CO2 extinguishers discharge completely in about 8 to 30 seconds depending on size, and the operator cannot stop the flow once the valve is open.
Stored Pressure Versus Cartridge Operation
Not all extinguishers maintain pressure in the main cylinder. Cartridge-operated dry powder units keep the powder in the main cylinder at atmospheric pressure and store the expellant gas in a small separate cartridge. When the user pierces or opens the cartridge, the gas flows into the main cylinder and pressurizes the powder. The discharge parts are the same, but the firing mechanism and the internal gas path are different.
| Comparison point | Stored-pressure unit | Cartridge-operated unit |
|---|---|---|
| Main cylinder pressure in storage | Always pressurized, typically 1.0 to 1.4 MPa | Near atmospheric pressure until fired |
| Pressure indicator | Gauge mounted on the valve | No continuous gauge; cartridge is checked by weight |
| Leak risk over time | Higher, because every seal is constantly under pressure | Lower, because the main seals see pressure only at discharge |
| Pressure source | Gas sealed inside the same cylinder | Separate CO2 cartridge connected to the valve |
| Typical application | Portable 1 to 12 kg units for general use | Larger and wheeled units, industrial locations |
The practical takeaway is that stored-pressure units depend heavily on the integrity of the valve seals and the gauge, while cartridge-operated units depend on the condition of the cartridge, its piercing mechanism, and the gas path. Both systems share the same requirement for a clean siphon tube and a correctly sized hose or horn.
Common Part Failures and Inspection Checks
Knowing how parts fail is as important as knowing their names. The failure table below lists the most frequent defects found during inspection of fire extinguishers in commercial buildings, warehouses, and industrial sites. None of these defects is exotic, and all of them are visible or measurable during a routine check.
| Failed part | Typical symptom | Probable cause | Inspection method |
|---|---|---|---|
| Valve internal seal | Pressure drops into the red zone | Aged gasket, contamination, over-tightening | Read the gauge weekly; listen for hissing |
| Pressure gauge | Stuck needle, cracked lens, moisture | Drops, water ingress, frozen diaphragm | Visual check of dial and lens |
| Siphon tube | Weak spray or empty discharge after only part of agent is used | Cracked tube, wrong length, blocked strainer | Weigh the unit; discharge test during servicing |
| Hose or horn | Cracks, kinks, loose fitting | UV damage, chemical attack, physical impact | Visual inspection along the entire length |
| Safety pin | Missing or bent | Removed and not replaced, rough handling | Confirm pin is fully seated and sealed |
| Cylinder bottom | Rust, flaking paint, pitting | Moisture trapped by missing bottom ring | Lift the unit and inspect the base |
| O-ring at the neck | Slow pressure drop over weeks | Hardening, flattening, bead extrusion | Leak test at the neck joint |
The inspection frequency should follow the applicable local standard, but the quick checks below can be performed by any responsible person without opening the unit. They take less than a minute per extinguisher.
- Confirm the safety pin is present, unbroken, and locked in position.
- Read the pressure gauge and confirm the needle is inside the green zone.
- Look for dents, corrosion, or paint loss on the cylinder shell.
- Examine the hose and nozzle for cracks, cuts, or loose swivel nuts.
- Verify that the tamper seal is intact and the label is readable.
- Check that the wall bracket holds the unit securely and the access is clear.
- Record the date and the result of each inspection on the attached tag.
For CO2 extinguishers, which have no gauge, the standard check is to weigh the unit and compare the measured mass with the printed tare mass. A CO2 extinguisher can lose gas through a microscopic leak for months before becoming empty, and only the scale will reveal it. This is why a service schedule with recorded weights is the only reliable method for CO2 units, and why replacing the valve or O-ring immediately after a detected leak prevents a complete loss of charge.
Frequently Asked Questions About Fire Extinguisher Parts
Below are the questions that buyers, safety officers, and maintenance teams ask most often when they begin to inspect or replace the parts of a fire extinguisher. The answers are written for practical decision-making rather than general theory.
Which part of a fire extinguisher fails most often?
The valve seal and the pressure gauge are the two most common failure points. Valve seals age and allow a slow gas leak, while gauges get fogged, cracked, or stuck. Both failures leave the extinguisher appearing normal from the outside but functionally unreliable.
Can I replace a fire extinguisher hose without replacing the valve?
Yes, if the thread type and internal diameter match the valve outlet. The fitting is usually a swivel nut with a standard size. Verify the thread pitch and the hose inner diameter against the factory specification before purchasing a replacement.
Why do CO2 extinguishers not have a pressure gauge?
CO2 extinguishers are filled with liquid carbon dioxide and operate at a vapour pressure that rises and falls with temperature. A gauge would be difficult to interpret because the reading changes with the room temperature even when the fill is correct. Weighing the unit is a more reliable method.
Is the siphon tube interchangeable among different brands?
Not automatically. The tube length must match the cylinder height, and the top connection must match the valve inlet. A generic tube that is a few millimetres too long will block the bottom opening, while a short one leaves agent unused. Check the original part number and cylinder size before ordering.
What does a pressure gauge reading in the red zone mean?
It means the internal pressure is too low to produce a complete discharge, or in some cases too high after overpressurization. The unit should be removed from service, the cause identified, and the pressure corrected by a qualified service person.
Can I reuse a tamper seal or safety pin after a test discharge?
The safety pin can be reused if it is straight and undamaged, but the tamper seal must be replaced with a new one. A used pin may have a bent section that prevents it from seating fully or may be weakened at the bend point.
Why is the horn on a CO2 extinguisher made of plastic rather than metal?
Plastic and fibre horns are non-conductive, which is important because CO2 extinguishers are often used on electrical fires. They also tolerate extreme cold without cracking, while a metal horn would conduct heat away from the hand and risk frostbite instantly.
How do I know if a valve is suitable for my cylinder?
Check the cylinder neck thread, the service pressure, and the agent type. The valve pressure rating must be equal to or higher than the cylinder working pressure, and the valve material must be compatible with the agent. When in doubt, request the specification sheet from the valve supplier.

 Phone: +86-13456107058/+86-15967800709
 Tel: +86-574-62010128/+86-574-62010688
 E-mail:
  Factory: Huilong Village, Huangjiabu Town, YuyaoCity,Zhejiang Province, China





 Domestic Trade Manager
 Foreign Trade Manager
 VR Catalogue
